这是一份儿PHPer需要的远程开发环境(不依赖Windows,拥抱Linux)!
一般情况,开发者多使用Windows系统,PHPStorm、VSCode等软件让我们离不开Windows,但是,但是多数开发者更倾向于在Linux上部署环境。那么这一份教程就诞生了。(MacOS用户可以绕行)
工具
- PHPStorm
- Ubuntu 16.04
准备工作
在Windows系统上安装PHPStorm和VM虚拟机,在虚拟机中安装Ubuntu系统。
在Ubuntu安装lnmp(Linux+Nginx+MySQL+PHP)集成环境
wget http://soft.vpser.net/lnmp/lnmp1.6.tar.gz -cO lnmp1.6.tar.gz && tar zxf lnmp1.6.tar.gz && cd lnmp1.6 && ./install.sh lnmp
远程部署代码
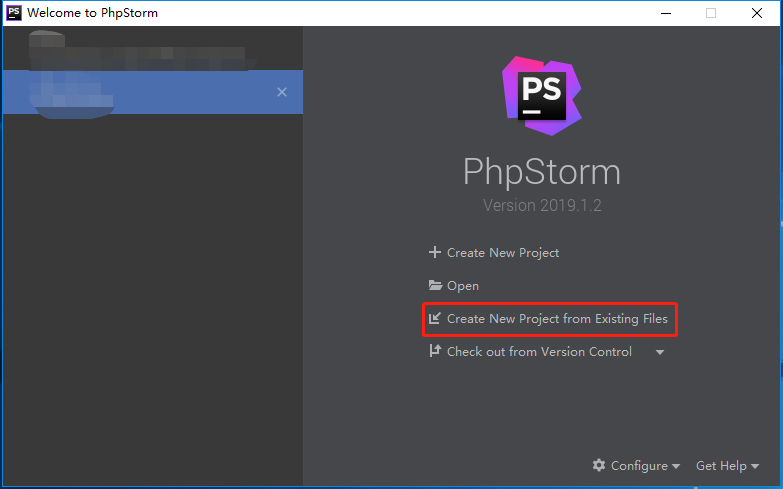
打开PHPStorm,选择Create New Project from Existing Files
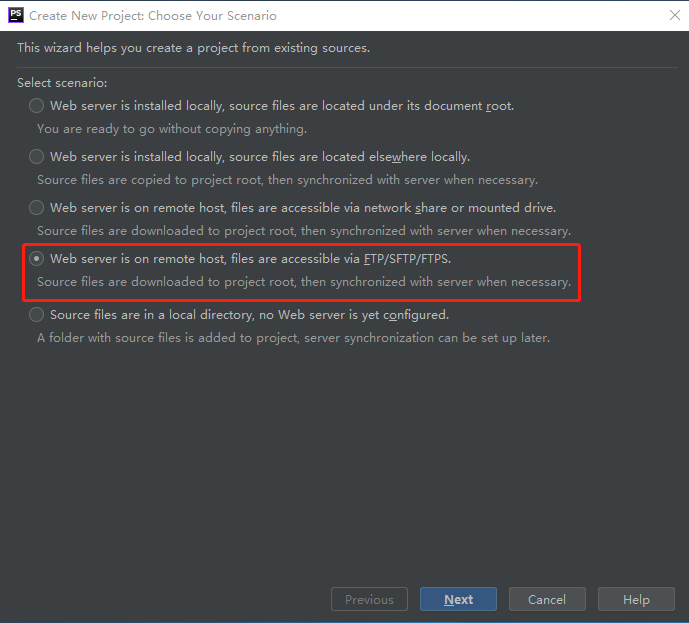
选择从远程服务器ftp同步项目
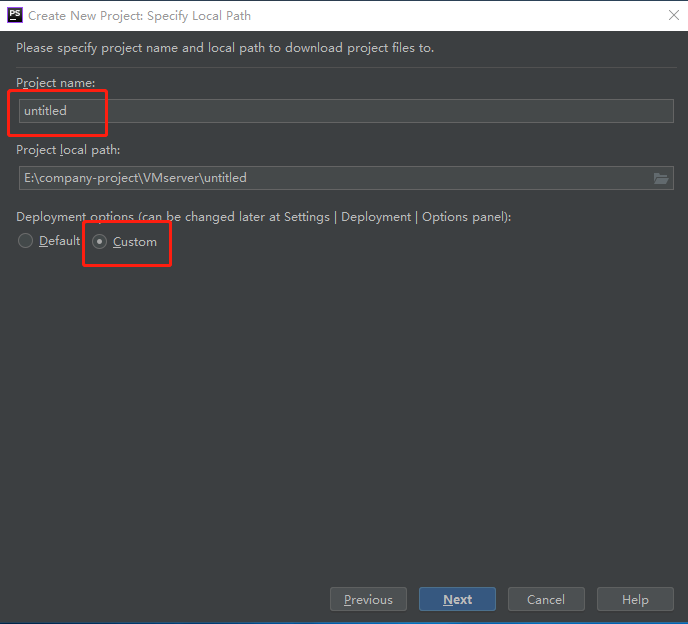
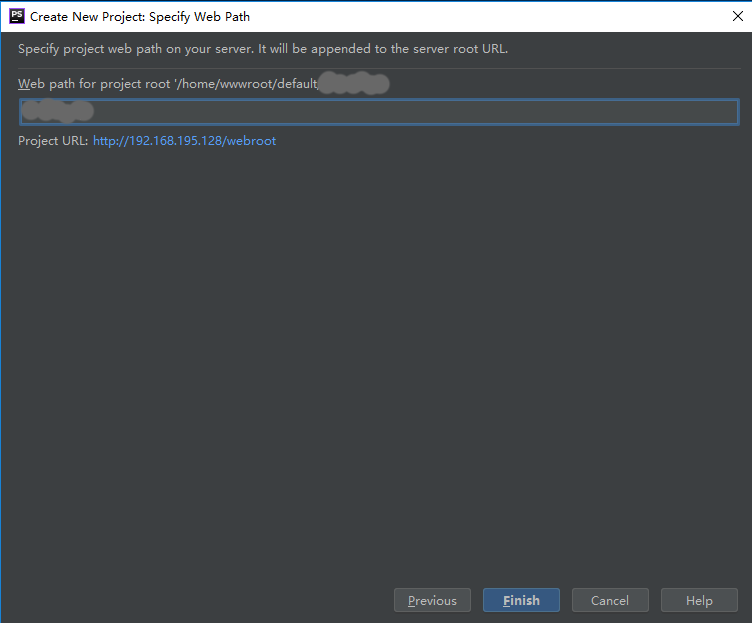
输入项目名,并选择要同步到本地的项目路径
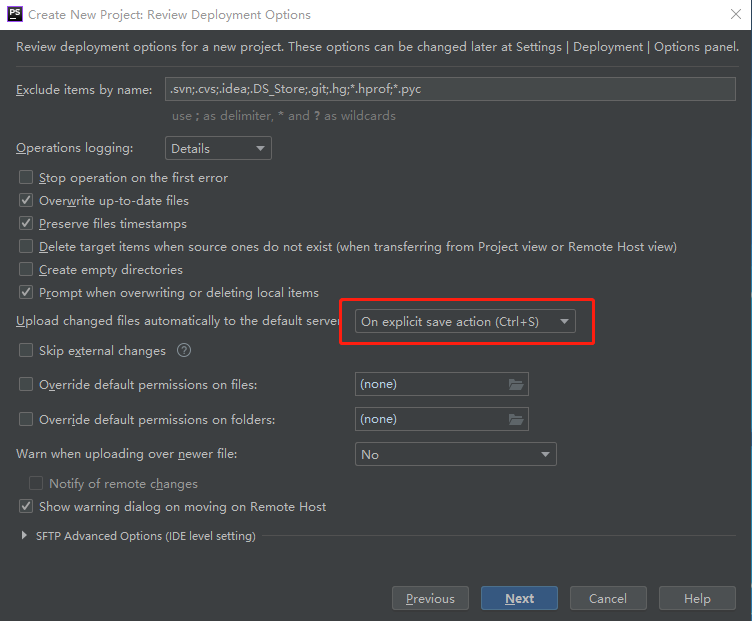
自动上传操作选择如下,当你Ctrl+S时,PHPStorm会帮你上传当前修改的文件到服务器。这样会相当方便。
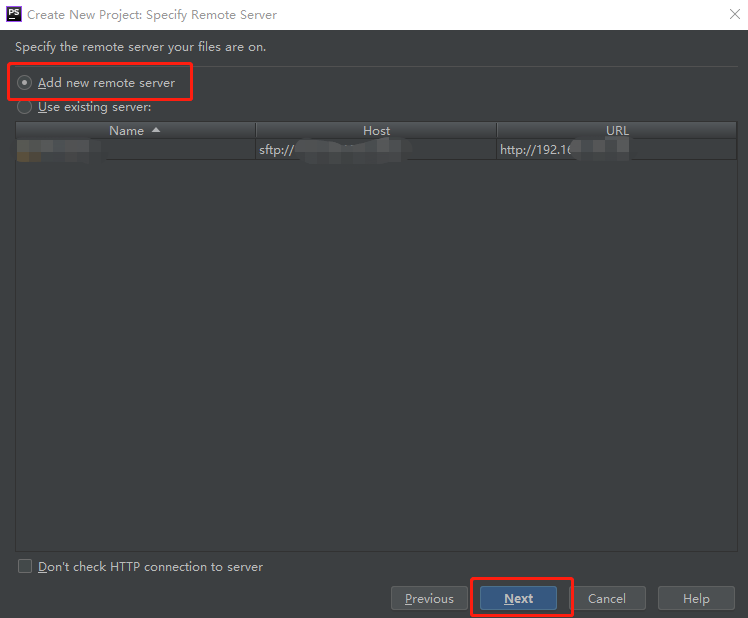
选择新建远程服务器
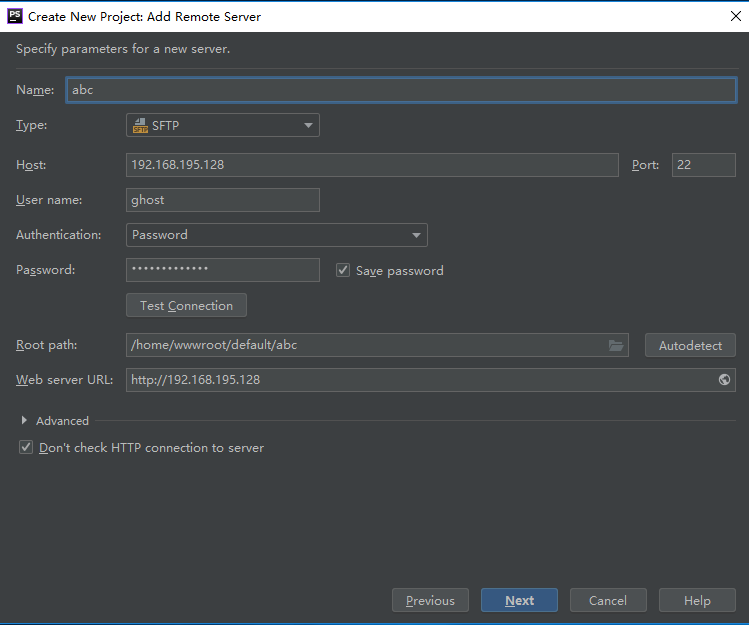
填写项目名,Type选择SFTP,填写服务器IP、用户名、密码以及远程项目所在的路径。
//linux下查看ip命令(不是Windows的ipconfig)
ghost@ghost-virtual-machine:~$ ifconfig
直接点finish,PHPStorm会自动同步远程服务器的代码。
远程debug
安装xdebug扩展
下载、编译xdebug
wget http://www.xdebug.org/files/xdebug-2.2.3.tgz
tar xzf xdebug-2.2.3.tgz
cd xdebug-2.2.3
/usr/bin/phpize
./configure --with-php-config=/usr/local/php/bin/php-config
make
make install
查看php安装路径下的lib 库目录是否生成了xdebug.so文件。(我的目录:/usr/local/php/lib/php/extensions/xdebug.so)
然后配置/usr/local/php/etc/php.ini文件,需要注意的是xdebug是zend扩展,zend_extension= "xdebug.so",而不是extension= "xdebug.so"。
[xdebug]
zend_extension= "xdebug.so"

xdebug.profiler_enable = on
xdebug.default_enable = on
xdebug.trace_output_dir="/tmp/xdebug"
xdebug.trace_output_name = trace.%c.%p
xdebug.profiler_output_dir="/tmp/xdebug"
xdebug.profiler_output_name="cachegrind.out.%s"

xdebug.remote_enable =1
xdebug.remote_handler = "dbgp"
xdebug.remote_host = 10.0.100.236 //本机的ip,不是虚拟机或者远程服务器的ip
xdebug.remote_mode = "req"
xdebug.remote_port = 9001
如果不知道本机的ip或本机为动态ip,需要加入xdebug.remote_connect_back,将其设置为1,此时xdebug.remote_host会失效。
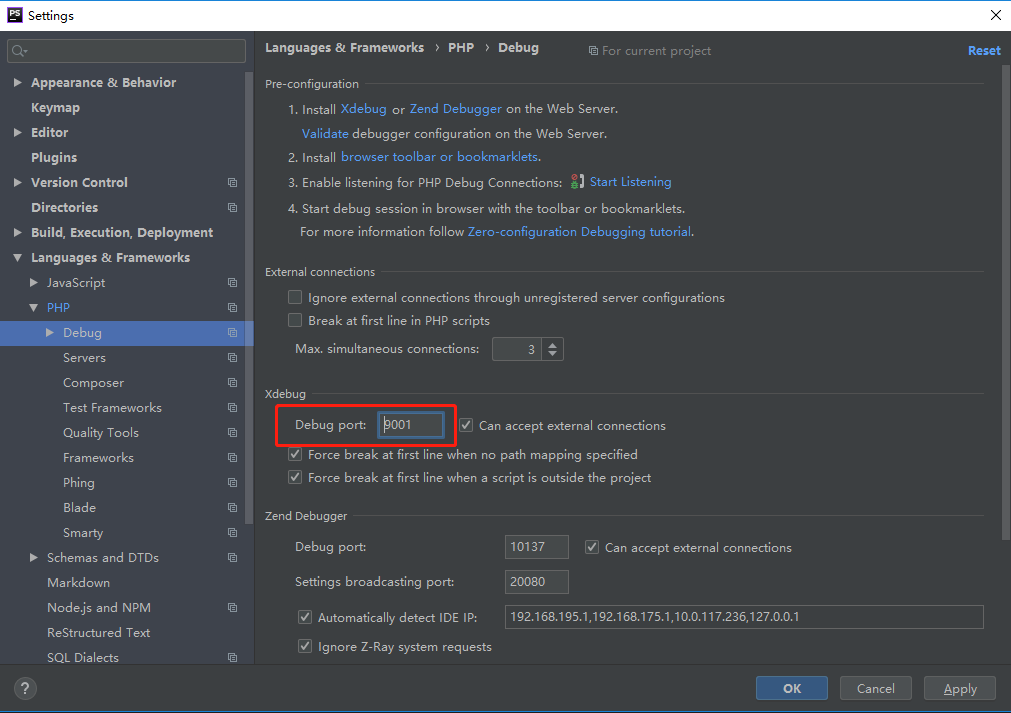
PHPStorm中配置xdebug
首先,设置端口,此端口要与上文配置xdebug.remote_port保持一致。
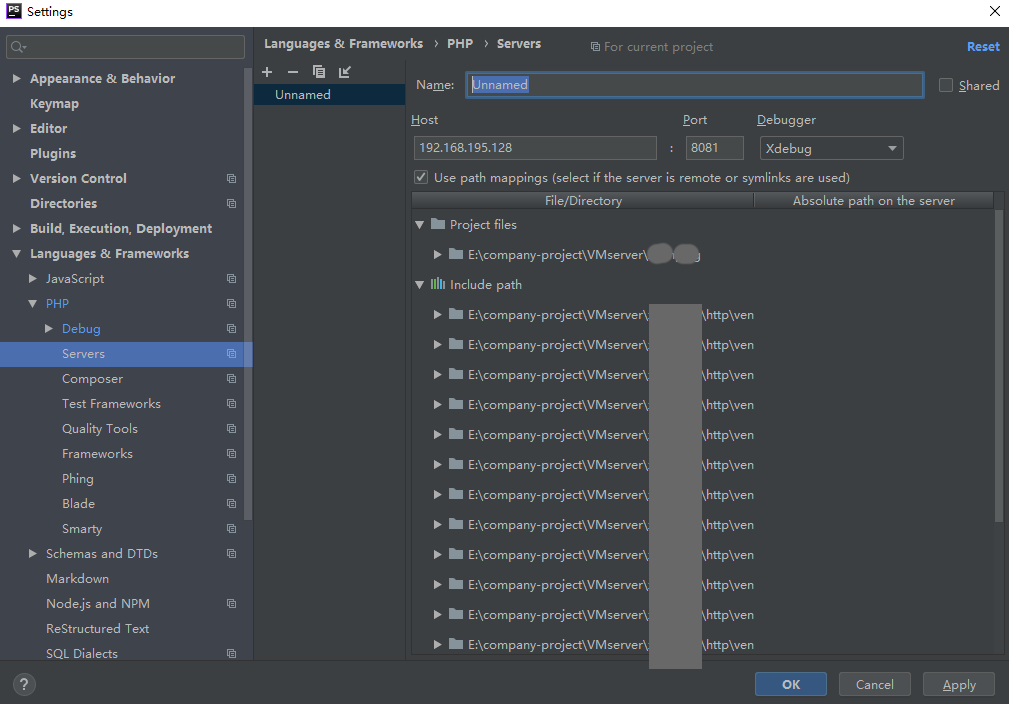
配置远程服务器,勾选Use path mappings,将本地文件与服务器文件相映射。
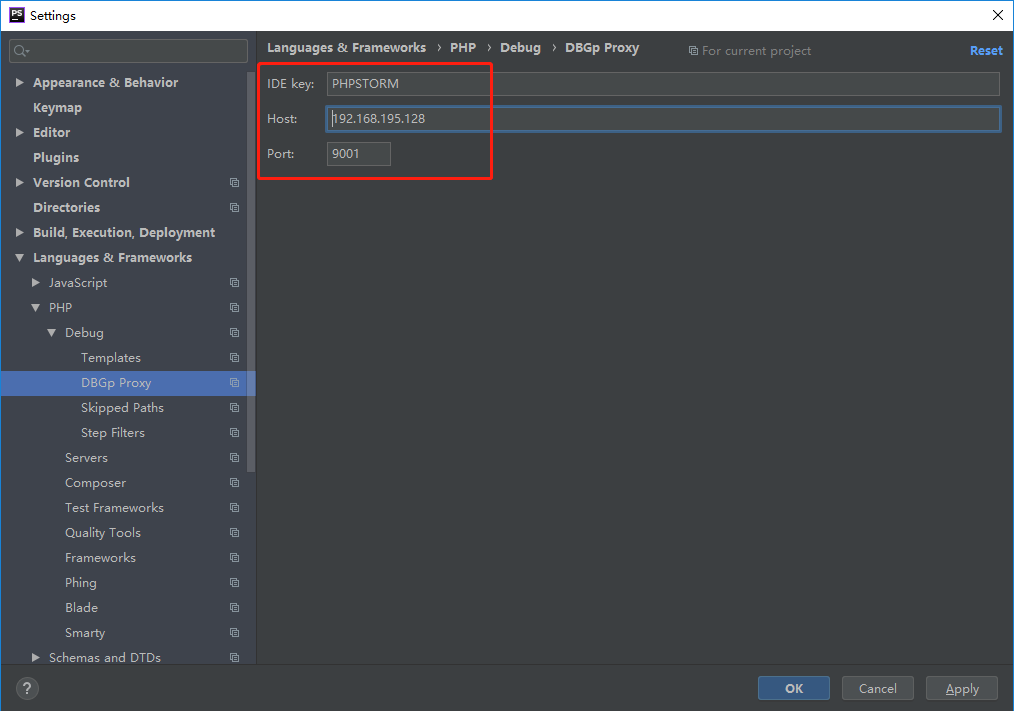
配置DBGP Proxy,输入远程服务器的ip和端口,IDE key填写为PHPSTORM。
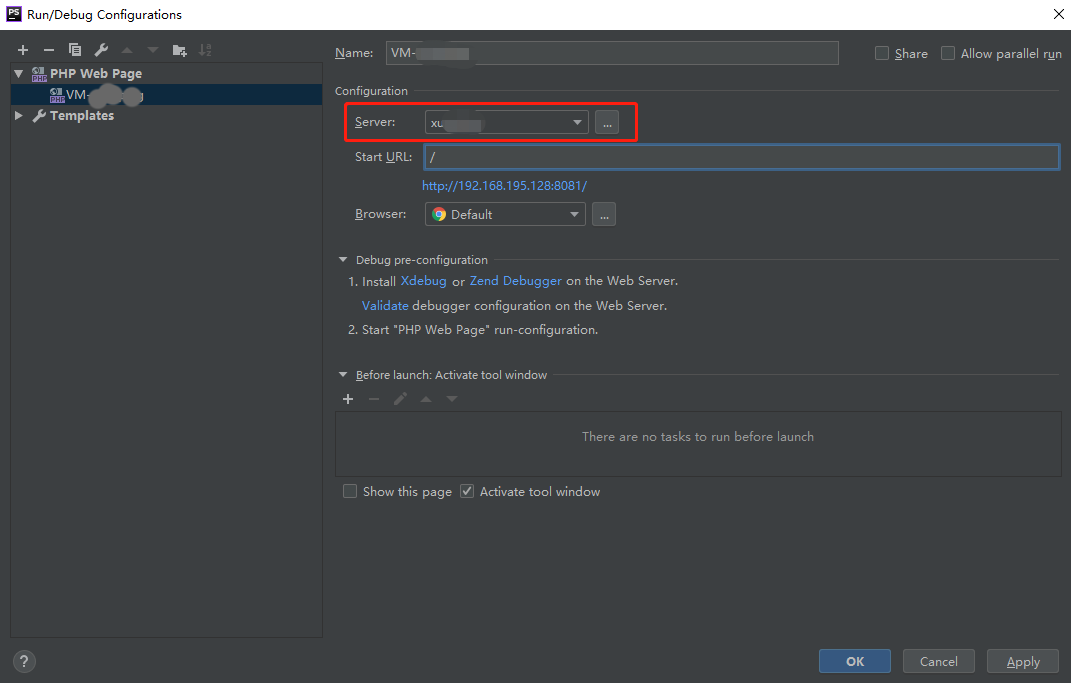
添加debug配置,选择刚刚创建的Server
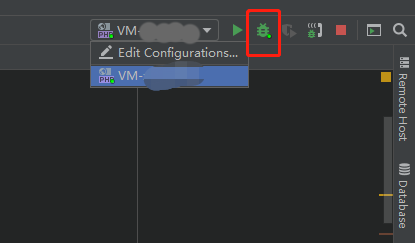
选中debug配置,在代码中打断,点击小虫子开始调试。
PS:如果使用虚拟机中Linux,想要在本机通过浏览器访问虚拟机中的项目,需要在Nginx中将项目ip设置为虚拟机的ip,而不是127.0.0.1。如果多个项目怎么办呢?IP相同,用不同的端口号区别不同的项目。
segmentfault文章地址 https://segmentfault.com/a/1190000019757483